I feel the need to state that upfront, lest you think my ambitions are of a more galactic or interdimensional scale.
No, my domain is this beautiful, muddy, rock-filled sphere, and I am here to make the most of it.
My current mission? To transform a sad, empty patch of my front yard into a thriving, 100-gallon aquatic ecosystem.
Because why should the backyard have all the fun?
But success, as they say, breeds ambition. And my ambition, staring out the front window at a boring flower bed dominated by a giant pine tree, whispered one word: More.
So, let the chronicles of the Front Yard Pond begin. Strap in, folks. It’s about to get muddy.
The Hunt for the Perfect Plastic Hole

The Hunt for the Perfect Plastic Hole
Every great project starts with a bargain, and I found mine gleaming under the fluorescent lights of a Lowe’s clearance aisle.
There it was: a 100-gallon, pre-formed pond shell. Its original price of $284 had been slashed, not once, but twice, down to a beautifully specific $142.06.
I did a little victory dance right there in the garden center, much to the alarm of a man comparing bags of mulch.
This wasn’t just a good deal; it was fate. Other, flimsier ponds were going for over $355!
This one was sturdy, a good size, and its design—with built-in shelves for plants—was perfect.
Crucially, its rigid structure meant I could potentially keep it partially above ground, a key consideration given the aforementioned giant pine tree and its network of subterranean tentacles.
I loaded the beast into my cart, looking for all the world like a man who had just won a very specific, very bulky lottery.
When the Earth Fights Back

With the pond shell procured, Phase One was simple: outline the sucker and start digging.
I felt like a sculptor, poised to reveal the masterpiece hidden within the clay. The reality was more like a dental hygienist fighting a root canal.
My shovel hit the first tree root about six inches down. It was thick, stubborn, and unyielding.
I moved over a foot. Another root. And another. I wasn’t digging a hole; I was performing an archaeological survey of a tree that clearly owned the mineral rights to my entire property.
The grim realization dawned: I couldn’t just sever these massive roots. I like my tree. I like the shade it provides. I do not like the idea of it falling on my house out of spite.
So, the plan changed on the fly. New Plan: the pond would be completely above ground, nestled into the natural slope of the land near the pine tree.
It was a setback, but a manageable one. My solution? Bags of topsoil. Lots of them.
I became a master of micro-topography, using a level like a surgeon’s scalpel to create a perfectly even, raised foundation from dirt.
It was less “rugged pioneer” and more “meticulous pastry chef building a dirt cake.”
My Kingdom for a Pile of Wood

Now, buying enough topsoil to build a small earthen fort seemed wasteful. My solution? Recycled wood.
I have a habit, some might say a compulsion, of collecting discarded logs and branches. I call it “strategic resource acquisition.”
I used these logs and branches as the filler for my raised pond base. It’s a brilliant, if I do say so myself, long-term strategy.
The logs create a strong, porous structure that holds the soil, and over time, they’ll biodegrade, slowly settling and filling any voids. It’s a self-compacting foundation!
The project truly leveled up the next day when I discovered the motherlode: a “Grab and Go” pile of weathered wood at a local landscape supply place for the princely sum of $3.99.
I loaded my car until the suspension wept, then unloaded it all to form a sturdy, rustic support base for what would become the pond’s upper deck.
It looked… well, it looked like a jumble of sticks to the untrained eye. But to me, it looked nice and decently integral. A work of structural art.
The Great Wall of Logs

With my woodpile secured, I got to work shaping the area. This wasn’t just about stacking logs; it was about engineering.
I placed them to form retaining walls, creating gentle slopes and terraces for planting. I used freshly cut, weathered pieces for their strength and character, even incorporating a gnarly old tree stump and a perfectly forked branch as a natural bird perch.
I interlocked them like a giant, organic Jenga puzzle, creating a structure that would resist erosion and say “no” to soil slumpage.
I filled the gaps with the soil I’d excavated (see? No waste!), carefully ensuring the pond’s rim was level with its new earthen borders.
Then, on the high side, I built what can only be described as a “massive caldera” using more found lumber—a kind of volcano-shaped mound ready to be planted.
It was dramatic. It was bold. It was probably a bit much for a Tuesday.
Hiding the Evidence with Cardboard and Rocks

Hiding the Evidence with Cardboard and Rocks
With the basic shape formed, it was time for the makeover.
First, I compacted all the dirt by stomping around on it like I was crushing grapes for wine.
Then, I laid down a layer of cardboard over the entire area. This is a pro-gardener move: it blocks weeds from sprouting and then biodegrades, feeding the soil.
It’s a win-win, unless you’re a weed, in which case it’s a total loss.
Next came the rocks. The goal was to hide the harsh, black plastic edge of the pond shell and make it look like it had naturally bubbled up from the earth.
I carefully selected rocks from my ever-growing collection, curving them to match the pond’s shape and interlocking them for stability.
One layer looked good, but two layers looked natural. It was starting to look less like a project and more like a place.
The First Wave of Green

Now for the fun part: planting! I’m a big believer in using native plants. They’re resilient, they attract local wildlife, and they don’t need to be coddled like divas.
My initial plant assault included:
• Sabal Minor Palmetto: For that tropical, “I-think-we’re-in-Florida” height.
• Sunshine Ligustrum: A pop of screaming lime-green for contrast.
• Variegated Shell Ginger: For fabulous stripes and texture.
• Drift Rose: A low-growing groundcover that promises a burst of color.
• Inland Sea Oats: A wildlife magnet, especially for birds.
• Mystic Spire Salvia: Basically a bee nightclub.
• Agapanthus and Blanket Flower: For classic, happy blooms.
My strategy was one of layering: smaller plants near the top edges, taller ones cascading down toward the center.
I was painting with plants, and my canvas was starting to come alive.
A Splash of Purple Panic

A quick return trip to Lowe’s yielded my secret weapon: Wandering Dude (Tradescantia zebrina).
This plant is the MVP of the gardening world. It’s a vibrant, almost electric purple, it grows like it’s being chased, and you can snap off a piece, stick it in the dirt, and it will grow a whole new plant.
I used it to break up the bed visually, adding pockets of shocking color that would soon spill over the rocks and soften all the edges.
Let There Be Waterfall!

The moment of truth had arrived. It was time to make water move. I filled the pond with a hose—all 100 gallons of it—feeling a profound connection to every civilization that ever relied on aqueducts.
Then, I got to work building the waterfall.
I stacked flat rocks to create a base, then installed the heart of the operation: a $20 pump from Amazon, complete with a spillway and a filter pad.
I snaked the hose up behind the rocks, buried it, and then spent a comical amount of time artfully arranging stones to conceal all the mechanical bits. I flipped the switch.
A moment of silence… and then, a beautiful, steady stream of water cascaded down the rocks and into the pond.
No spills. No leaks. Just the perfect, gentle sound of moving water. It was oxygenating the pond and providing a visual centerpiece.
To complete the tropical vibe, I added a Red Ti plant, a Colline flower, and a majestic Elephant Ear that looked like it was auditioning for Jurassic Park.
Building the Stairs of Necessity
As I admired my work, a practical thought surfaced: how was I going to get to the pump for maintenance? Or feed the future fish?
The answer was not “by scaling the slippery rock face.” So, I built a small, stable staircase out of flat rocks, creating safe and easy access for all my future pond-stewarding needs.
Safety first, even in Eden.
Filling in the Blanks (With More Plants)

The final planting phase was a blur of greenery. I added an Evergreen Yaupon Holly for year-round structure.
I tucked in Guara, Agastache, and Itea Virginica for more flowers and height. I added Gregg’s Mistflower for its fuzzy blue blooms, Carex Illa for a grass-like texture, and accents of Ice Plant and Coreopsis.
I even placed a large, beautifully weathered rock I found, because every garden needs a personality rock.
The very back of the bed, behind the massive caldera, was transformed into a mini pepper garden, featuring a spineless cactus (nopales) from my uncle and some jalapeños hiding in the back.
A secondary access path was created with a single flagstone. The details matter.
The Mulchpocalypse

To stabilize everything and make it look finished, I embarked on what I call “The Mulchpocalypse.”
I mixed compost and topsoil to fill every remaining gap, enriching the entire area.
I used river rocks and even pine cones to prevent erosion on the slopes. Then, I blanketed everything in a thick layer of pine bark and shredded hardwood mulch.
This locks in moisture, suppresses weeds, and gives everything that crisp, “professional” look.
A final decoration with shells and more river rocks added the last bit of textural interest.
The Final Frontier: The Front Border

Not content to stop, I expanded the planting to the very front of the garden bed.
I added native Tickseed Coreopsis for a wild, meadow-style feel, and a Sensitive Plant (Mimosa pudica)—a fantastic groundcover whose leaves curl up when you touch it.
To balance the height of the pine tree, I planted a Knockout Rose in front of it.
The goal was a lush, wildlife-friendly meadow, right there in the front yard.
The Dirty Bottom Line

With the landscaping 99% done, it was time to focus on the pond’s interior.
I drained all the water (sigh) to add a substrate layer. You can’t just have a bare plastic bottom; aquatic plants need something to root in, and beneficial bacteria need a place to live.
I used a mix of backyard soil, sand, and organic matter, topping it off with three bags of sand to create a 2.5-inch deep bed.
Then, in went the aquatic plants: native Pickerelweed for the pollinators and some Horsetail I had cleaned of fertilizers.
I topped it all with a layer of pea gravel to keep it all in place. For the fish, I added a flat rock under the waterfall for them to lounge on, a broken pot for a shelter, and a variety of river rocks for texture.
As a final act of optimism, I planted 8-10 lily pad seeds from Amazon. Hope, as they say, springs eternal.
The Moment of Truth: Take Two
I filled the pond for the second time. The water turned a terrifying, muddy brown. I panicked for approximately three minutes before remembering that this is normal.
The fine particles just need to settle. I turned on the filter and waited.
Within hours, it had cleared to a mere murky green, and within a day, it was crystal clear.
The total project time, from first dig to final plant, was about two weeks, worked on intermittently whenever the Earth and my schedule would allow.
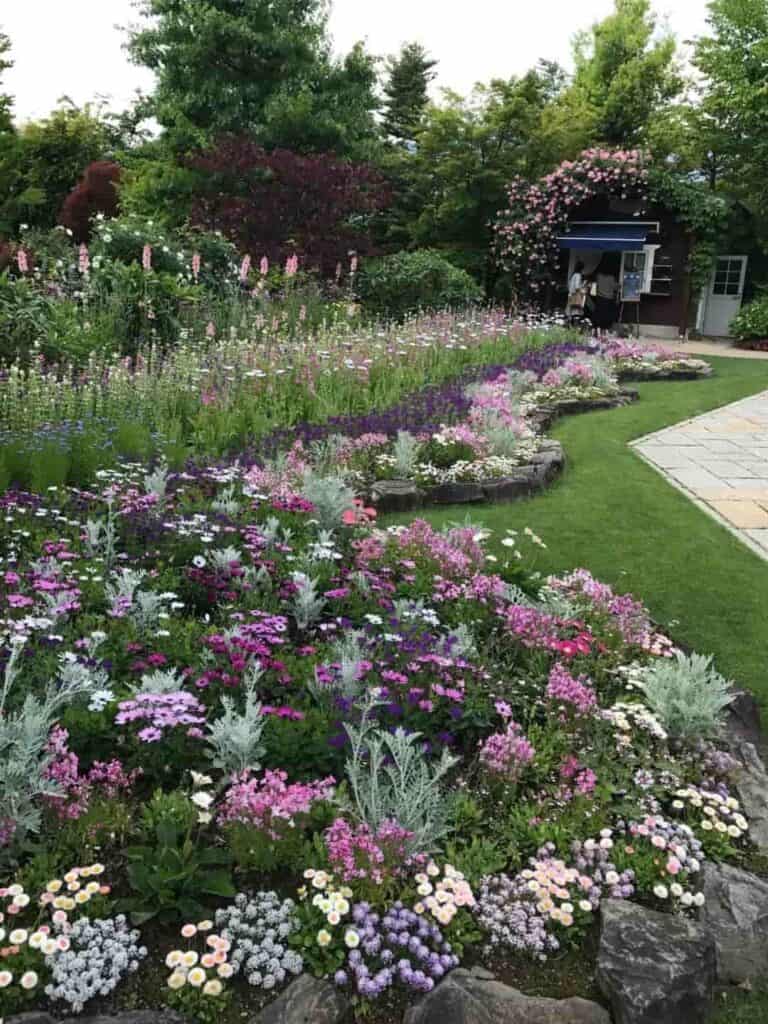
I stood back and looked. It was no longer a flower bed. It was a lush garden oasis.
A terraced, thriving, bubbling ecosystem. Earth is my planet, and I had built a pretty cool little corner of it.
The Fishy Finale

It was time for the main event: the fish. My first attempt was a school of elegant White Cloud Minnows. They were beautiful.
For about a day. Then they vanished. Poof. My theory? A clever heron, a stealthy raccoon, or perhaps they formed a tiny fish cult and ascended to a higher plane.
The solution was to cover the pump intake with mesh to prevent any future… incidents.
Then, I went for hardier, and let’s be honest, cheaper stock. I introduced 20 Rosy Red Minnows and one single, gloriously weird Comic Goldfish with a black top. Total cost: $4.72.
The goal was to see if they could survive and thrive. They did. They school, they explore, they nibble on algae, and that one goldfish acts like the grumpy superintendent of the entire operation.
Conclusion: An Oasis, Not Just a Pond
So, there you have it. What started as a clearance aisle dream is now a living, breathing part of my front yard.
It’s not just a pond; it’s a habitat. It’s a conversation starter with neighbors. It’s my daily dose of calm, sitting there with a cup of coffee, listening to the waterfall and watching the bees buzz and the fish dart.
I’m incredibly proud of this little ecosystem I’ve built from a pile of logs, some rocks, and a bargain-bin pond shell.
It’s proof that you don’t need a massive budget, just a bit of vision, a lot of sweat, and a willingness to let the Earth guide you.
There are more aquatic builds in my future, more plant experiments to try. But for now, I’m just going to enjoy this one.
After all, Earth is my planet. And I’m just getting started.