Is your DVD collection taking over your living room, sneaking onto coffee tables, and hiding under the couch?
It’s probably time for a storage upgrade that doesn’t involve heavy-duty shoving or pretending those stacks are “art.”
Building your own DIY DVD storage closet lets you show off your movie stash and keeps everything tidy, all without spending a fortune on fancy furniture.
Why Build a DIY DVD Storage Closet?

Let’s be honest—storing your DVDs in cardboard boxes under the bed just isn’t cutting it. With a DIY DVD storage closet, you can actually find that rare 90’s rom-com without pulling a muscle.
When you build your own storage, you pick how many shelves, how tall, and even get to say, “Yes, I want pink polka-dot wallpaper behind my action movies.” You don’t have to settle for furniture that kind-of, almost, sort-of fits your DVDs; your closet will fit them perfectly.
Another plus: displaying your DVD collection in a closet keeps it clean and (mostly) dust free—unless you ignore dusting for a year. It’s also less likely someone will “borrow” your favorite movie and never return it.
Customize things like shelf height, adjustable racks, or even labels, so you’ll never again spend fifteen minutes hunting for your copy of Shrek 2.
Assessing Your DVD Collection
First, count your DVDs. Don’t trust your memory—your collection has probably grown while you weren’t looking. Grab a piece of paper or open a note on your phone, and make a list as you stack each box.
You’ll be amazed how many movies you have. Start sorting by genre, favorite directors, or even by embarrassment-level (High School Musical? Nobody needs to know). If some cases are damaged, set them aside for repairs or replacements.
It helps to measure how much shelf space you’ll need. Stack 10 DVDs together and use a ruler to see how wide and tall they are. Multiply these numbers by the number of rows you want. Here’s a quick estimation table:
| DVDs Owned | Estimated Shelf Length Needed |
|---|---|
| 50 | 15 inches |
| 100 | 30 inches |
| 200 | 60 inches |
Choosing the Right Location

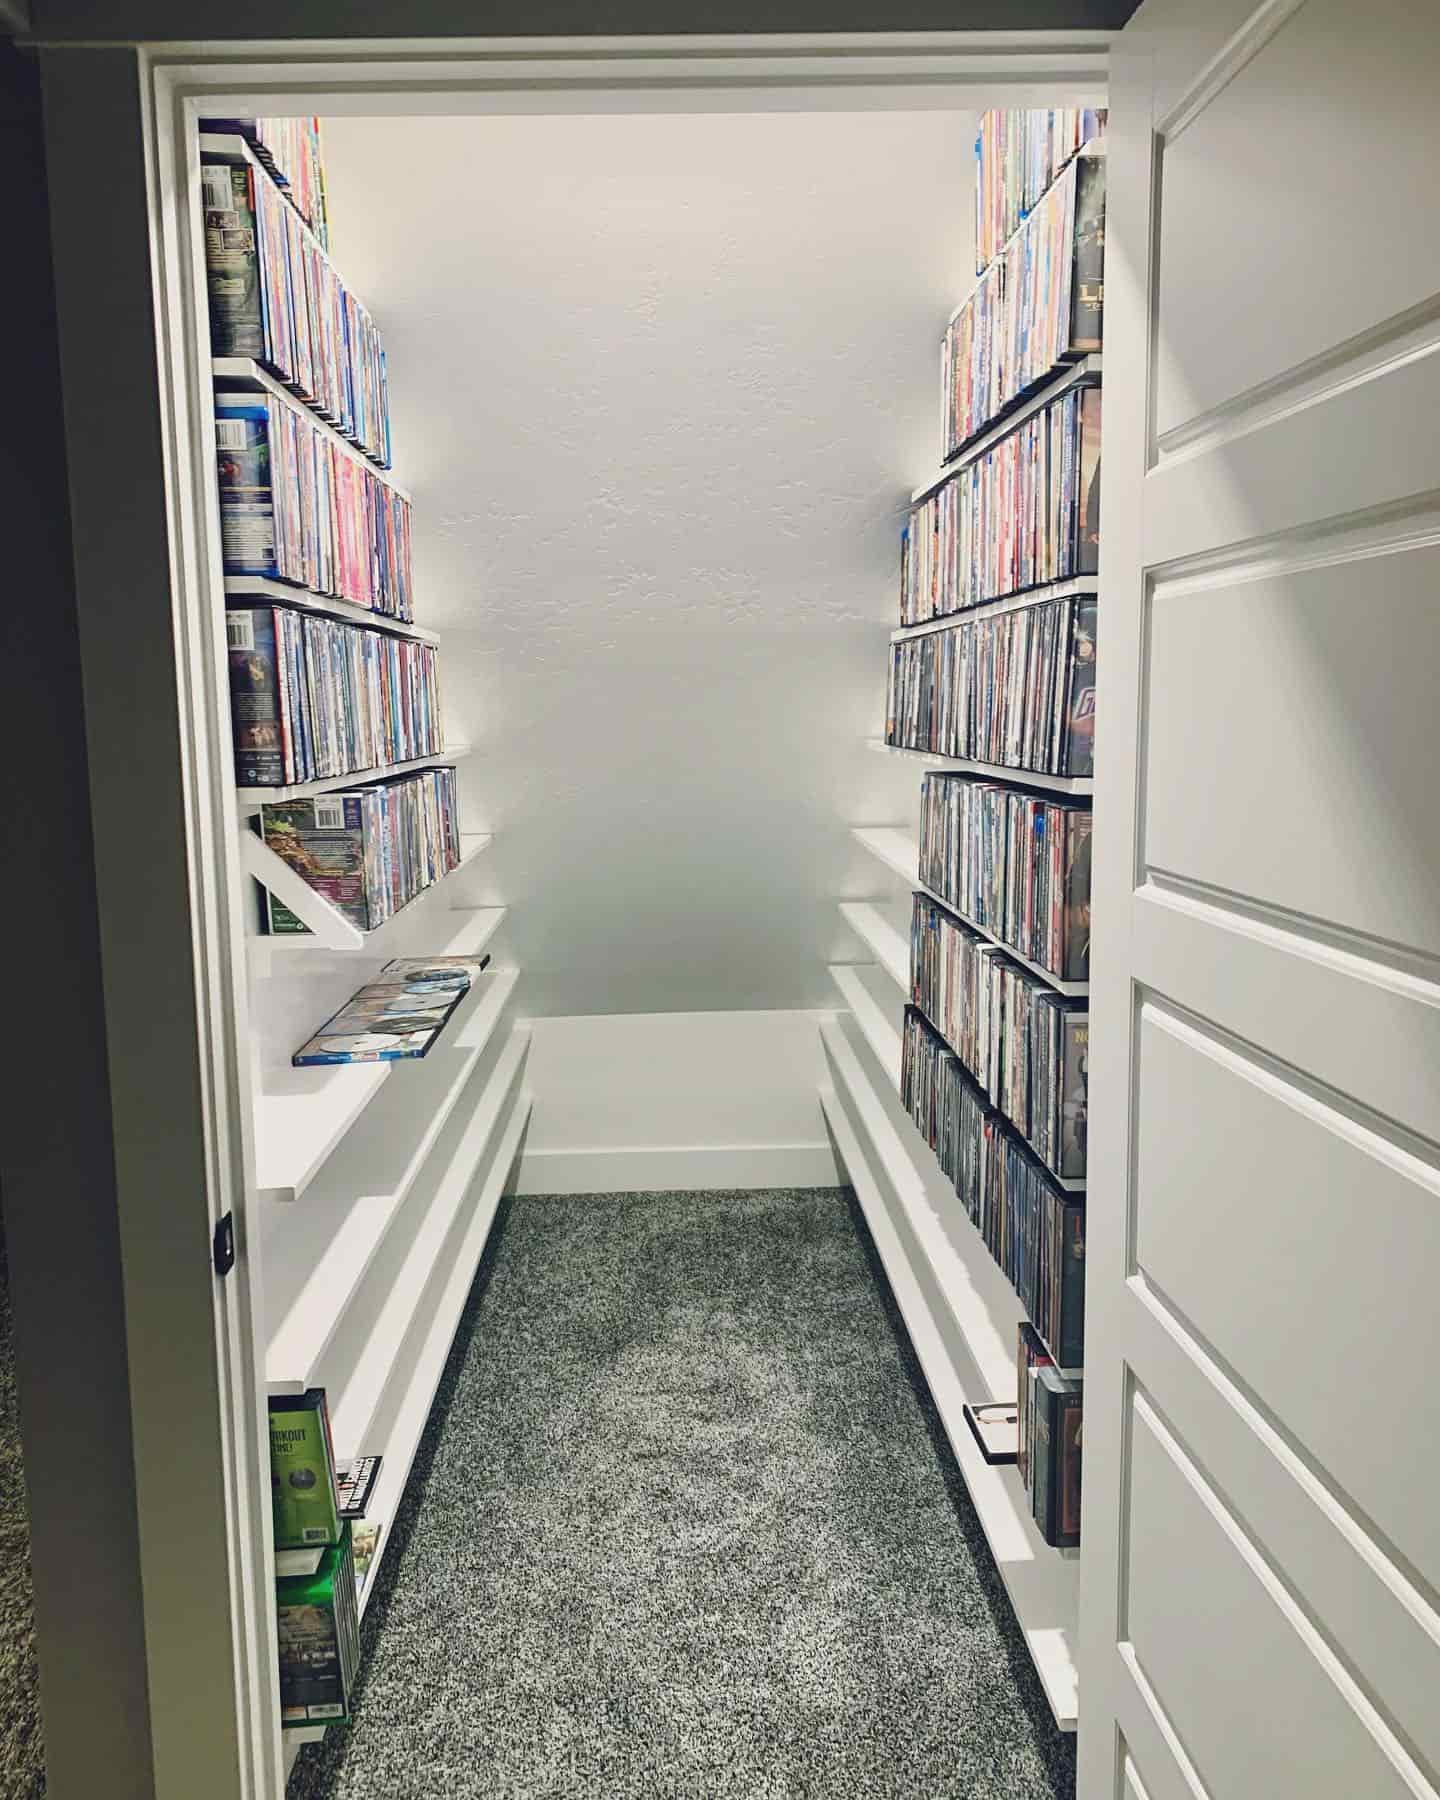
Pick a spot that keeps your movies safe, easy to grab, and away from skateboard collisions or spaghetti sauce disasters. Under the stairs closets are a popular place, or you might use a hallway, spare room, or a corner of your living room like in this DIY DVD storage closet idea.
Keep your collection away from direct sunlight, unless you want sun-faded covers and melted discs. Humidity is also the enemy: avoid places near kitchens, bathrooms, or Yak-filled saunas.
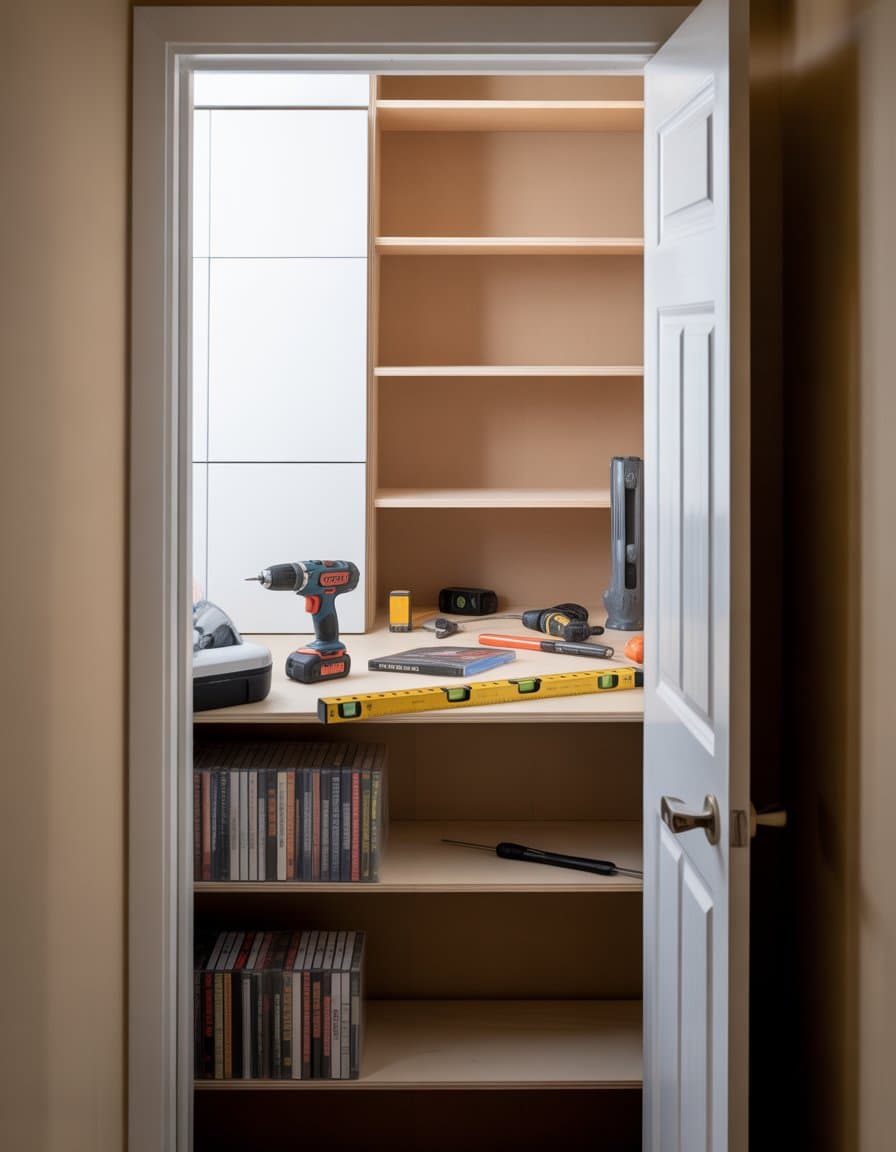
Closet Layout Options
Let’s face it, your DVDs deserve more than just a sad, dusty shelf. Start by deciding if you want open shelving, closed cabinets, or a mix of both. Open shelves help you see all your movies at a glance (and show off your pride and joy: The Lord of the Rings extended edition box set).
If you want to hide clutter or those questionable bargain-bin titles, consider cabinet doors or curtains. Adjustable shelves work like magic, letting you fit tall special-edition cases or awkwardly sized box sets without having to wedge anything in at an angle.
If you share the closet, try using labeled storage baskets or fabric bins for each family member. This means you won’t find your copy of Jurassic Park stuffed behind yet another copy of Frozen. Use bold labels to make sure everyone can find their pick on movie night. For tight spaces, vertical storage or even behind-the-door racks can make room for every disc.
Incorporating a DVD Rack

A DVD rack might sound plain, but with a bit of creativity, it can become the star of your closet. Consider a wall-mounted rack to save floor space—perfect for when shoes and laundry baskets already rule the floor.
If you’re feeling crafty, go for a DIY DVD rack using wood, metal pipes, or even a reclaimed ladder (your DVDs will never fall off the rung if you skip leg day). Want a quick fix? Try tension rods across the closet wall to slide in DVDs—not only is it cheap, but it also makes you look like a storage genius.
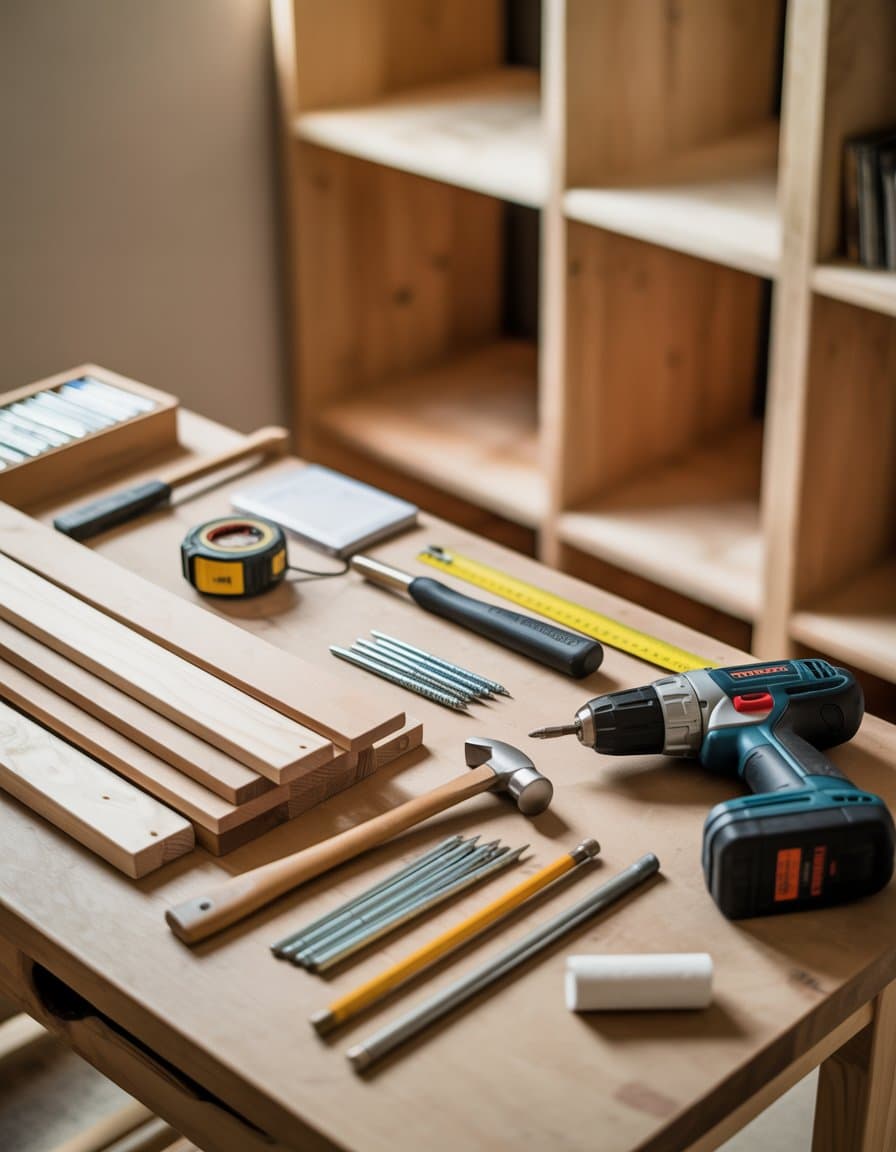
Materials and Tools You’ll Need
You’re going to need wood—yes, forget about cardboard unless you want your DVDs crashing down mid-movie. Most DIY projects use boards like 2″x4″x8’s for framing and 1″x4″x8’s for shelving. Make sure the boards are straight by checking them in the store, even if it means rolling them down the aisle. Nobody wants wonky shelves.
For the backing, grab a 1/4-inch sheet of plywood. This helps keep your masterpiece sturdy and gives you something to nail the shelves into. Don’t forget finishing nails (about 1 3/4″), wood glue, some brackets if you want your shelves extra strong, and maybe a little wood filler for fixing mistakes (not that you’ll make any—of course). If you want to store your DVDs and cases neatly, measure so each shelf fits them standing up with a slight gap for easy grabbing.
Tool Checklist
To slice and dice your wood to the perfect size, a circular saw does the trick. If you want straight lines, measuring tape and a square are your new best friends. Mark your cuts with a pencil—bonus points if you actually cut along the line.
A power drill makes life easier for putting in screws or making pilot holes. A finishing nail gun speeds things up compared to hammering every nail by hand, but don’t worry if you only have a regular hammer—just be ready for an arm workout. Sandpaper or a block smooths out rough edges, so your DVDs don’t get scratched from new shelf splinters.
Prepping the Closet Space
Getting your closet ready for DVDs means more than just shoving things aside. To make the most of your storage space, you’ll need to measure your area carefully and map out each shelf like you’re planning a blockbuster heist.
Measuring and Clearing
First, face the monster lurking in your closet: everything you’ve been hiding for years. Old shoes, that unmated sock, mystery boxes—out they go. Clear every single item out so you have a blank slate.
Grab your tape measure and start getting real. Measure the height, width, and depth of your closet. Write these numbers down (don’t trust yourself to remember). Knowing your space means you won’t build shelves perfect for Barbie DVDs—but useless for your epic Lord of the Rings extended editions.
A simple table like this can help:
| Dimension | Measurement |
|---|---|
| Height | |
| Width | |
| Depth |
Marking Shelving Placement

Use a pencil and a level to mark the heights where each shelf will go. For most DVDs, shelves spaced about 10 inches apart work well, according to this diy dvd storage closet guide.
Measure from the floor up and mark each spot. If your collection includes box sets, you might need one shelf with a little more space—think luxury condo for that complete Harry Potter series.
Run painter’s tape across your marks for a clear visual. Then, double-check the spacing with a DVD case before you start drilling holes.
Installing Adjustable Shelving

You want your DVD storage to grow with your collection—because let’s be honest, that special edition trilogy set isn’t the last thing you’ll buy. Adjustable shelving lets you customize shelf height, so no awkward leftover space or DVDs stuck in exile.
First, grab a tape measure and mark your shelf heights. For most DVD cases, 10 inches between shelves works well and leaves enough room for your fingers to gracefully pluck out a movie without wrestling the rack. Check out visual guides like this DIY DVD storage closet plan at Bless’er House for spacing tips that don’t require an engineering degree.
Supplies you’ll need:
- Shelf brackets (the adjustable kind, not the “oops, that shelf fell again” kind)
- Sturdy shelf boards, preferably 3/4″ thick
- A pencil for marking (or whatever writing utensil the junk drawer coughed up)
- Level (unless you want your DVDs to slide left every time you close the door)
Install the bracket tracks on your closet walls first. Double-check they’re straight unless you want your movies playing gravity roulette. Slide the shelf boards onto the brackets. Wiggle test approved? You’re ready for the next step.
Securing DVD Racks

Adjustable shelving is great, but your DVDs need more than hope and a flat surface. Properly securing DVD racks keeps those action flicks and rom-coms from toppling into a leaning tower every time you grab something new.
Choose racks made for DVDs—they’re narrower than book racks, so DVDs don’t wobble or fall over. Look for styles you can screw or nail into the shelf sides. This keeps your discs upright and organized, not piled like a chaotic bargain bin.
How to secure DVD racks:
- Position your rack on the shelf, making sure it’s centered.
- Use short screws or finishing nails to anchor the rack into the shelf board. Drill pilot holes first to keep things tidy (and avoid splitting your brand-new boards).
- Double-check all screws are flush, so your DVD cases glide in and out without hitting snags.
If you prefer a less permanent method, pick racks with grippy feet or adhesive pads. But beware—sticky options may lose their tackiness over time, especially if your closet turns into a sauna mid-summer.
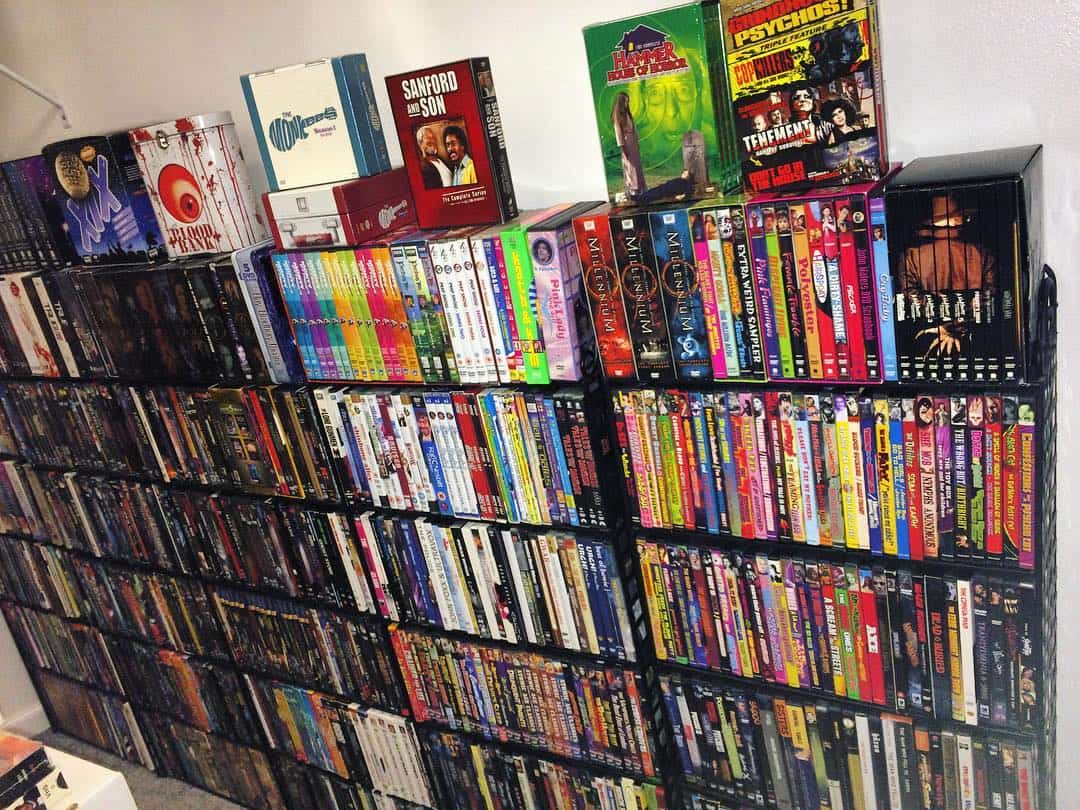
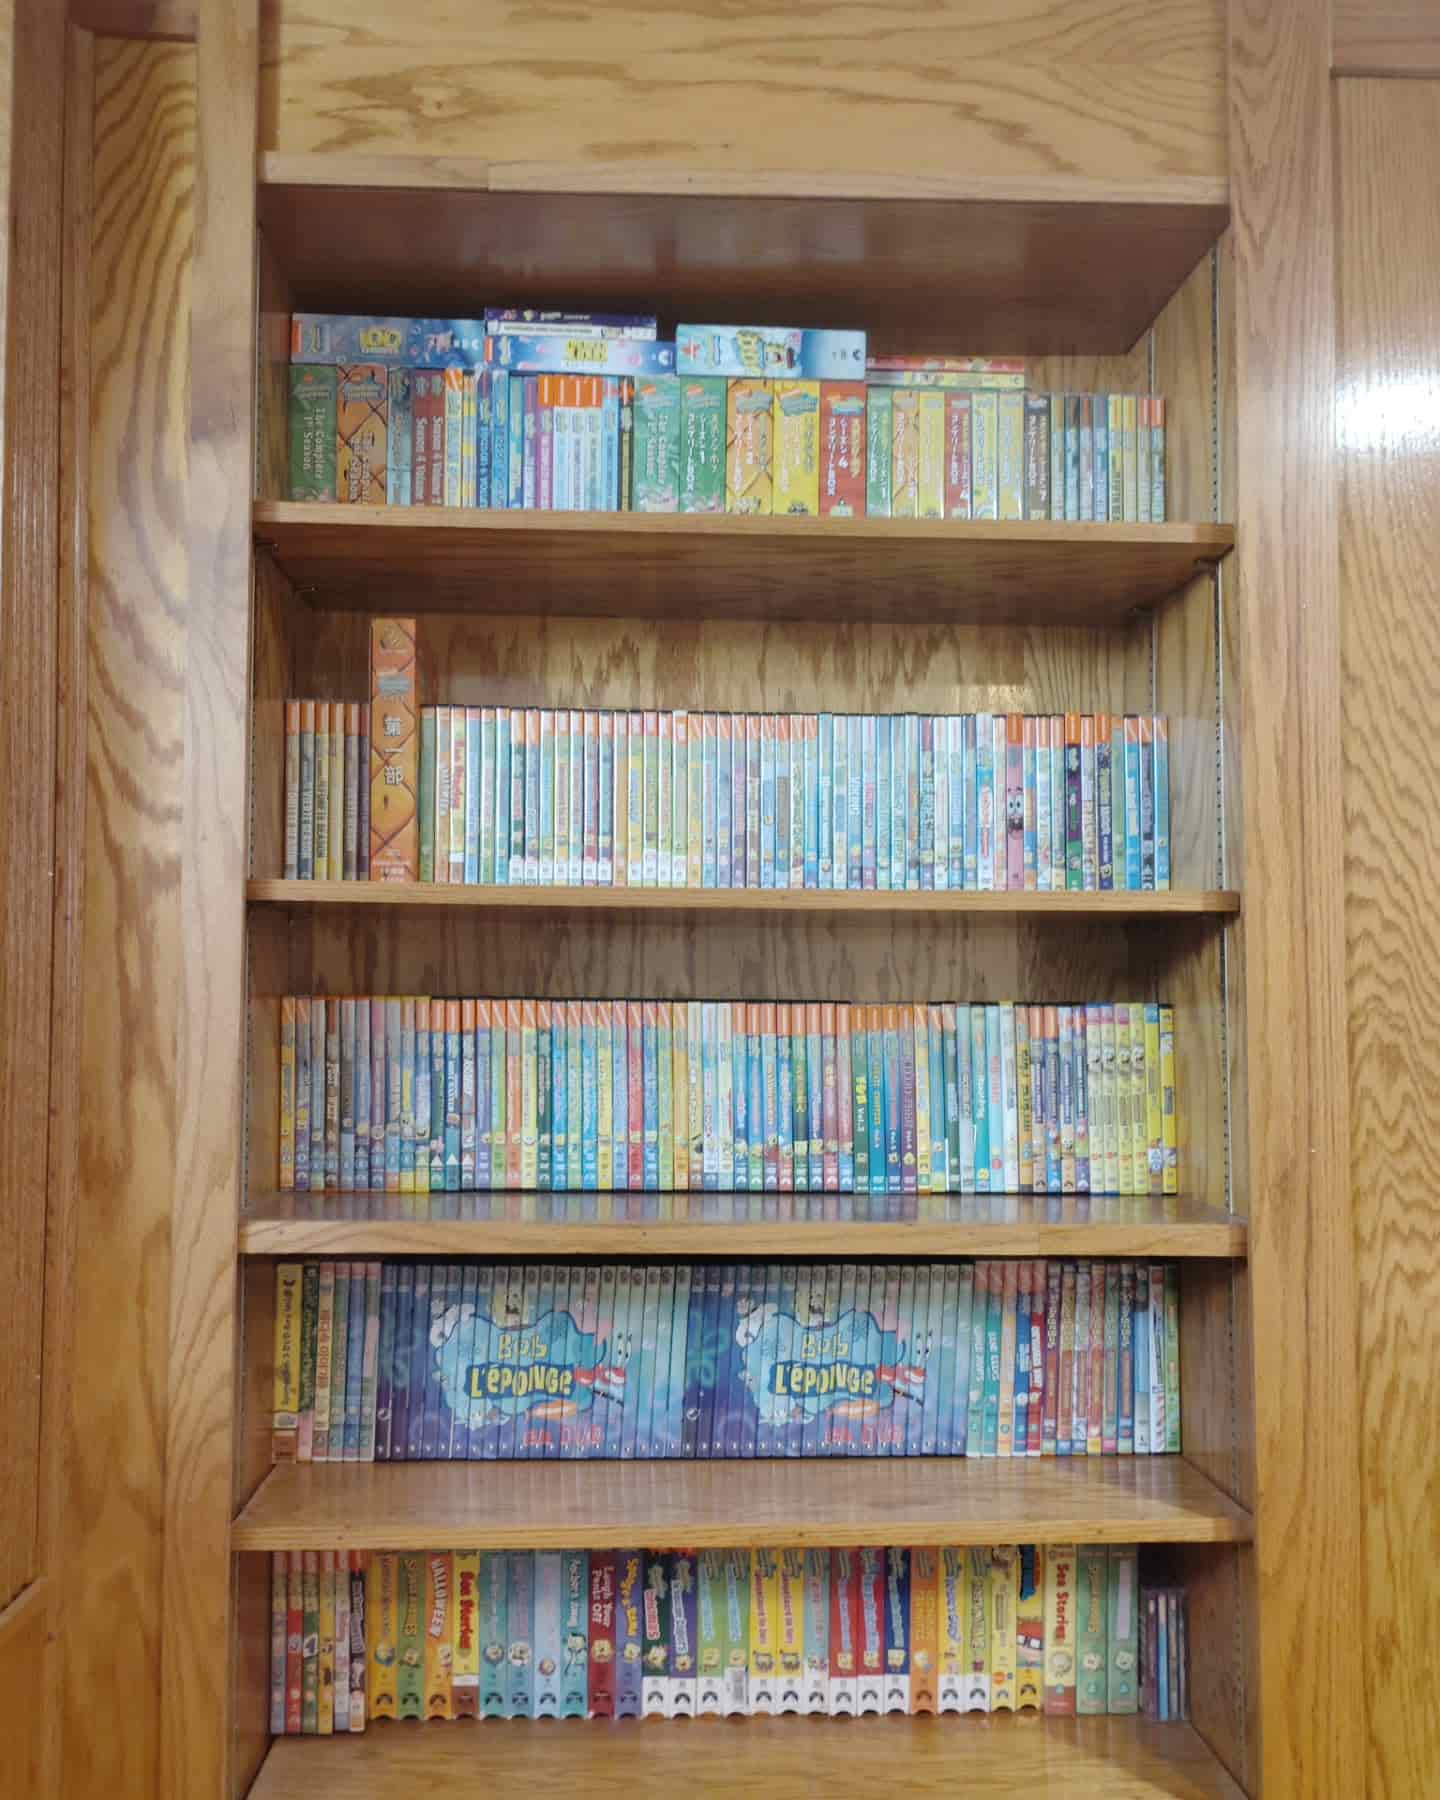
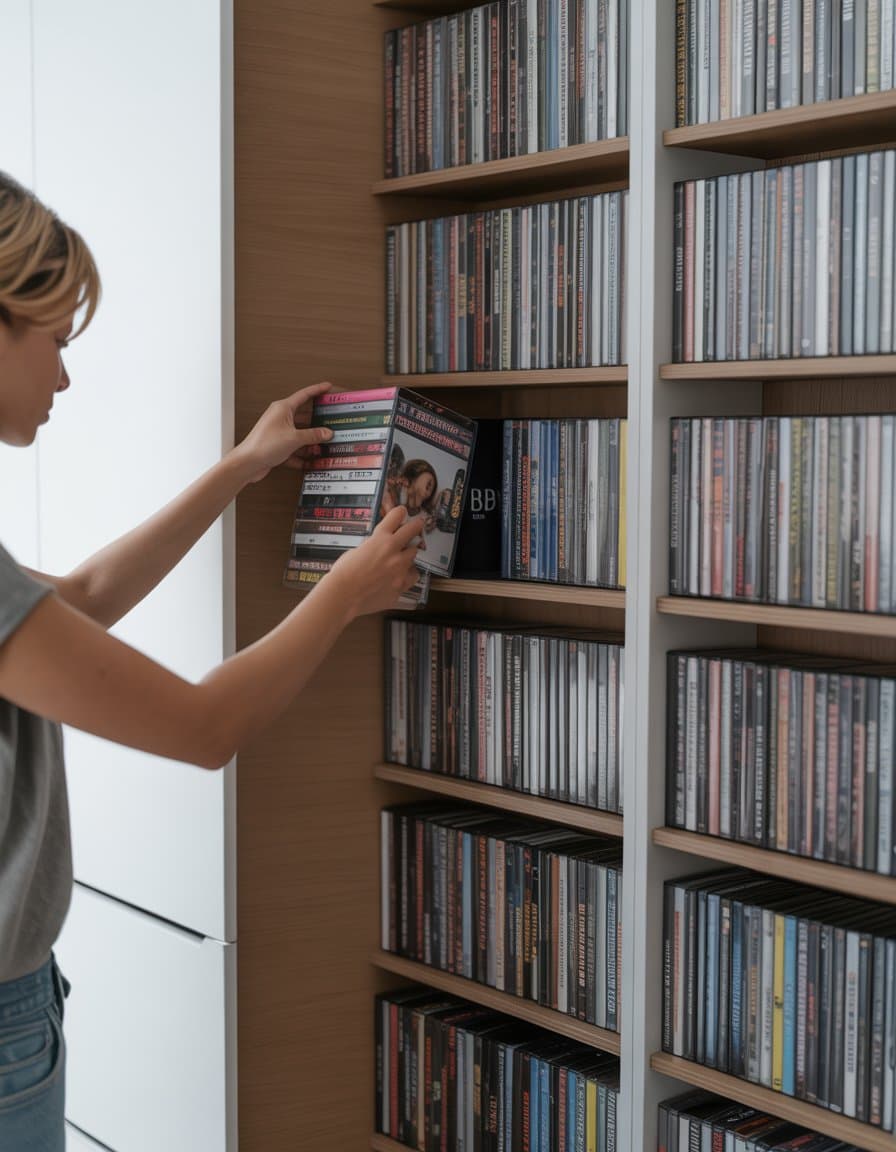
Organizing DVDs in Your Closet

DVD chaos is no joke. Whether you have a classic movie collection or enough cartoons to open your own kid’s channel, keeping everything neat can save your sanity and maybe your Saturday afternoon.
Sorting by Genre or Alphabet

When you start organizing DVDs, the first debate is always genre versus alphabetical order. Think of it like the pineapple on pizza argument—everyone has an opinion. Pick genre if you want to find “Action” on a wild movie night and laugh maniacally because you know exactly where it is. Or go alphabetical if searching for “Zorro” should come right after “Aliens” instead of with “Family.”
Genre sorting pros:
- Easy to find what you’re in the mood for
- Great for themed movie marathons
- Helps keep similar cases together (comedy just looks happier stacked together)
Alphabetical order pros:
- You always know where a specific title is
- It’s easy to add new DVDs to the right spot
- No arguments over whether “Star Wars” goes under “S” or “Science Fiction”
Some people combine both, because why choose? Try a combo: sort by genre, then alphabetize within each group. This way, you find what you want fast but can still brag about how organized you are to anyone who will listen.
Labeling Strategies
Without labels, even the most organized DVD collection can become a guessing game. Avoid “Is this blank case my Oscar-winning drama or just another copy of ‘Sharknado’?!” by using clear labeling.
You can cut sticky labels in half to fit the spines of skinny DVD cases, or print neat titles using your home printer. Handwritten labels work too if your penmanship is less ‘doctor’s prescription’ and more ‘actual words.’ Color-coding adds another layer—red for horror, blue for sci-fi, and green for “why did I buy this?” movies.
Consider a simple table for quick tracking:
| Label Color | Genre |
|---|---|
| Red | Horror |
| Blue | Science Fiction |
| Yellow | Comedy |
| Green | Mystery/Thriller |
Regular Organization Tips
Start by sorting your DVDs in a way that makes sense for you. Alphabetical order is a classic, but sorting by genre or even by color (yes, it’s a thing) can make your DVD closet pop. Be sure to dust those shelves before you discover your copy of Shrek is now hosting a family of spiders.
Every few months, take a few minutes to do a quick review. Remove any movies you no longer watch—think of it as a little breakup with that fitness DVD you promised yourself you’d use. Store new acquisitions promptly so you don’t end up with teetering stacks on the floor.
Labeling shelves or sections with painter’s tape can help everyone in the house put things back where they belong. If your family or roommates struggle to tell the difference between action and romantic comedy, labels save the day (and your sanity).
Quick Organization Checklist
- Group DVDs by type (movie, TV, documentary)
- Dust shelves and cases regularly
- Label sections
- Cull old or unwanted DVDs