Keeping my shoes organized in the closet can be a challenge. DIY shoe shelves are a fantastic solution to maximize space, reduce clutter, and make my favorite pairs easily accessible.
Whether you have a small closet or a large collection of shoes, you’ll find options that fit your needs perfectly. From simple designs to more advanced projects, there’s something here for everyone looking to tidy up their shoe storage.
In this article, I’ll share a variety of creative and practical ideas for building your own shoe shelves.
Why DIY Closet Shoe Shelves?

Building my own closet shoe shelves has many benefits. First, I can customize them exactly to my needs. I choose the size and style that work best for my shoe collection.
Creating my own shoe storage allows me to maximize closet space. I can design shelves that fit snugly, keeping my shoes organized and easy to find. No more rummaging through a pile of shoes!
Aesthetic flexibility is another advantage. I can match the look of my shoe shelves to my closet decor. Whether I have heels, sneakers, or boots, I can make shelves that accommodate all my favorite footwear.
The cost savings are also significant. Rather than buying an expensive shoe organizer, I can use affordable materials and still get a stylish and functional shoe storage rack. This way, I have a personalized storage solution that fits my budget.
Tools And Materials You’ll Need
To build your DIY closet shoe shelves, you’ll need some essential tools and materials.
Tools
- Tape measure: For accurate measurements.
- Table saw: Essential for cutting plywood and furring strips.
- Drill and screwdriver: To drive screws easily.
- Level: To ensure everything is straight.
- Stud finder: Helpful for locating wall studs.
Materials
- Plywood: This acts as the main component for the shelves.
- Furring strips: Used for support and structure.
- Wood screws: To secure everything tightly.
- Dowel rod: Great for creating dividers.
- Wood filler: To cover any holes or surface imperfections.
- Spray paint: For a decorative finish if desired.
Additional Items
- Brad nailer: Speeds up the assembly process.
- Sanding block: Helps to smooth any rough edges.
Gather these tools and materials, and you’ll be ready to get started on your project!
Simple Wooden Shoe Shelves

I find wooden shoe shelves is a great way to organize my shoes while adding a personal touch to my closet.
To get started, I use basic materials and tools that are easy to find. For example, I cut wooden boards to the desired length. Next, I can choose between flat or angled shelves. Flat shelves are great for stacking shoes, while angled shelves improve visibility.
Customizing the wood is where I can have fun. A coat of paint or stain can match my closet decor perfectly. I often pick colors that brighten the space or create a warm feel.
These wooden shoe racks are perfect for small closets. They fit nicely in minimalist spaces where functionality is key. The plans I follow are straightforward, making this a solid beginner woodworking project.
If you’re looking for DIY shoe rack ideas, this is a simple option.
Tiered Shoe Shelf For Vertical Storage

I like to design a Tiered Shoe Shelf For Vertical Storage, which makes clever use of vertical space in your closet. This flexibility helps accommodate different shoe styles, from boots to flats.
For my shoe shelf, using materials like wood or metal provides durability. I usually prefer designs that allow space for dividers. These can help keep my shoes organized and separated, which I find essential.
I often add small bins on the sides for accessories. They’re perfect for shoe polish, insoles, or extra laces. This way, everything I need for shoe care is neatly stored nearby.
Tiered shelves work best in tall closets or narrow areas. They help maximize the available space without taking too much room. If you’re like me and enjoy a tidy closet, a vertical shoe rack can make a big difference.
Shoe Shelf With Built-In Bench

A shoe shelf with a built-in bench is a fantastic way to save space and add style to my entryway or mudroom. This dual-purpose design provides both shoe storage and a seat for putting on shoes.
To build this, I use wood for the shelves and add cushions on top for comfort. The cushions can be covered in soft fabrics, making it inviting. I choose sturdy brackets to support the shelves.
A mudroom bench with shoe storage can fit perfectly in larger closets. By painting the wood to match my decor, I create a cohesive look in the space.
This setup works wonders in preventing clutter while providing a convenient spot to sit. Plus, it allows me to organize my shoes neatly, keeping my entryway tidy.
DIY Shoe Shelves Using Cubbies
A cubby-style shelves can fit different types of shoes, from boots to heels.
I customize the size of each cubby to match the shoe type. This flexibility means I can maximize space while ensuring each pair has its own spot. It feels satisfying to see my shoes lined up neatly.
Sometimes, I even use fabric baskets inside the cubbies for a softer look. This keeps everything tidy while adding a personal touch.
Over-The-Door Shoe Shelves

Building an over-the-door rack is simple. I can use lightweight materials like wood, fabric, or wire. These can hang directly on the door.
To make it more versatile, I add hooks or adjustable shelves. This allows me to store different types of shoes easily. For example, taller boots or delicate sandals fit nicely when I adjust the shelves accordingly.
DIY Shoe Rack With Pipes

Materials Needed:
- Metal pipes: These provide sturdy support. You can choose to leave them raw or paint them for a customized style.
- Wooden boards: Select a type of wood that matches your decor. Cut them to the desired length.
Step-by-Step Process:
- Cut the wood to your preferred size for the shelves.
- Assemble the pipes: Use pipe fittings to connect them. This forms the frame of the rack.
- Attach the shelves: Place the wooden boards on the supported pipes, securing them firmly.
Repurposed Pallet Shoe Shelves

I love the idea of using old wooden pallets for shoe storage. With just a few modifications, they can become stylish and functional shelves.
First, I sand the pallets to remove any rough spots. A smooth finish makes a big difference.
I can choose to attach the pallets to the wall or keep them free-standing. Free-standing shelves give me flexibility in placement while wall-mounted options save space. Both methods work great for storing shoes.
Sliding Shoe Shelves For Hidden Storage
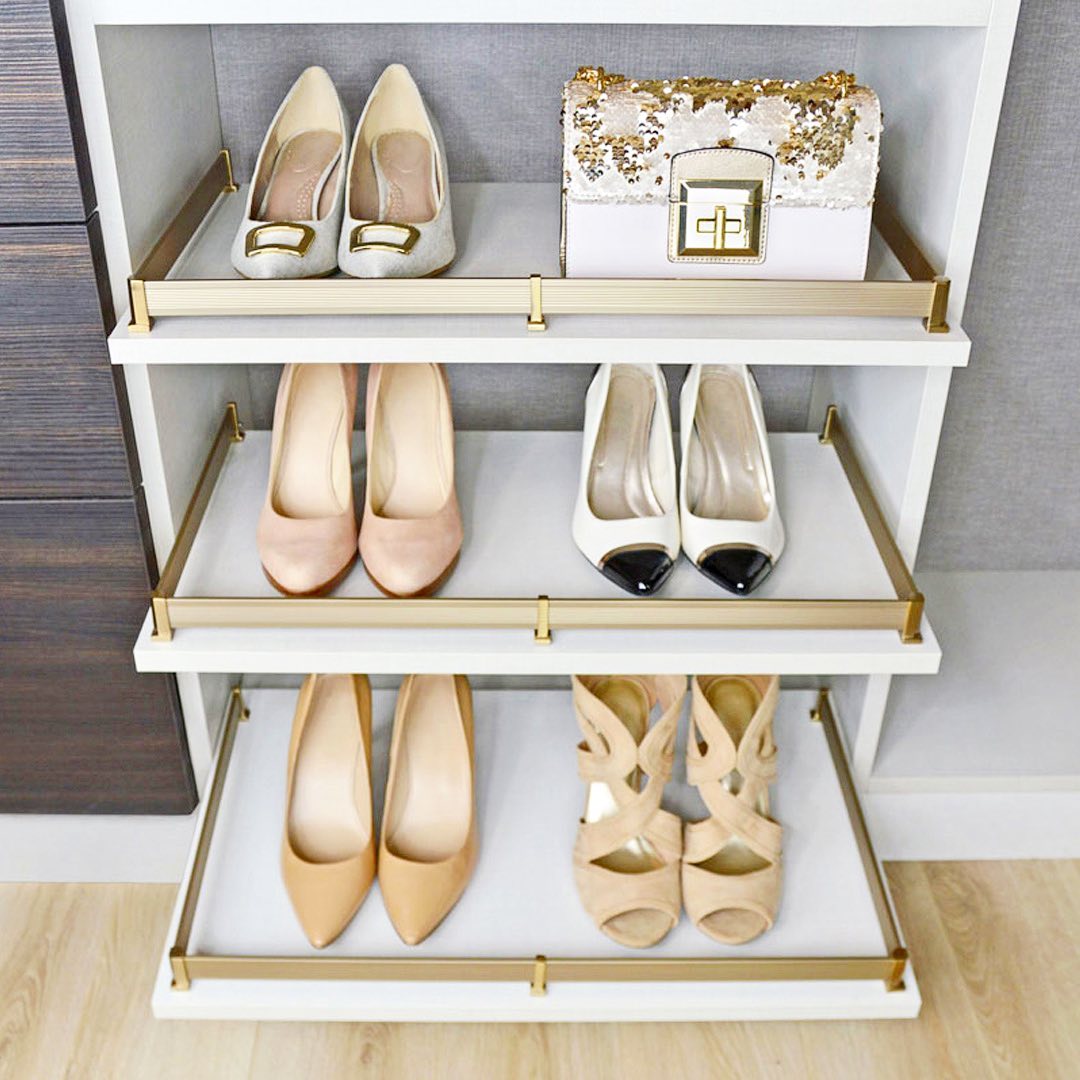
The sliding shoe shelves is a clever way to organize your footwear without cluttering your space. I love the idea of shelves that glide out for easy access and tuck away neatly when not in use.
To make these shelves functional, I recommend using smooth rollers or sliding tracks. They make it simple to pull the shelves in and out, turning your closet into a user-friendly area.
These shelves are fantastic for walk-in closets where keeping shoes hidden is beneficial. They blend style and convenience, making it easy to find the perfect pair without displaying them all.
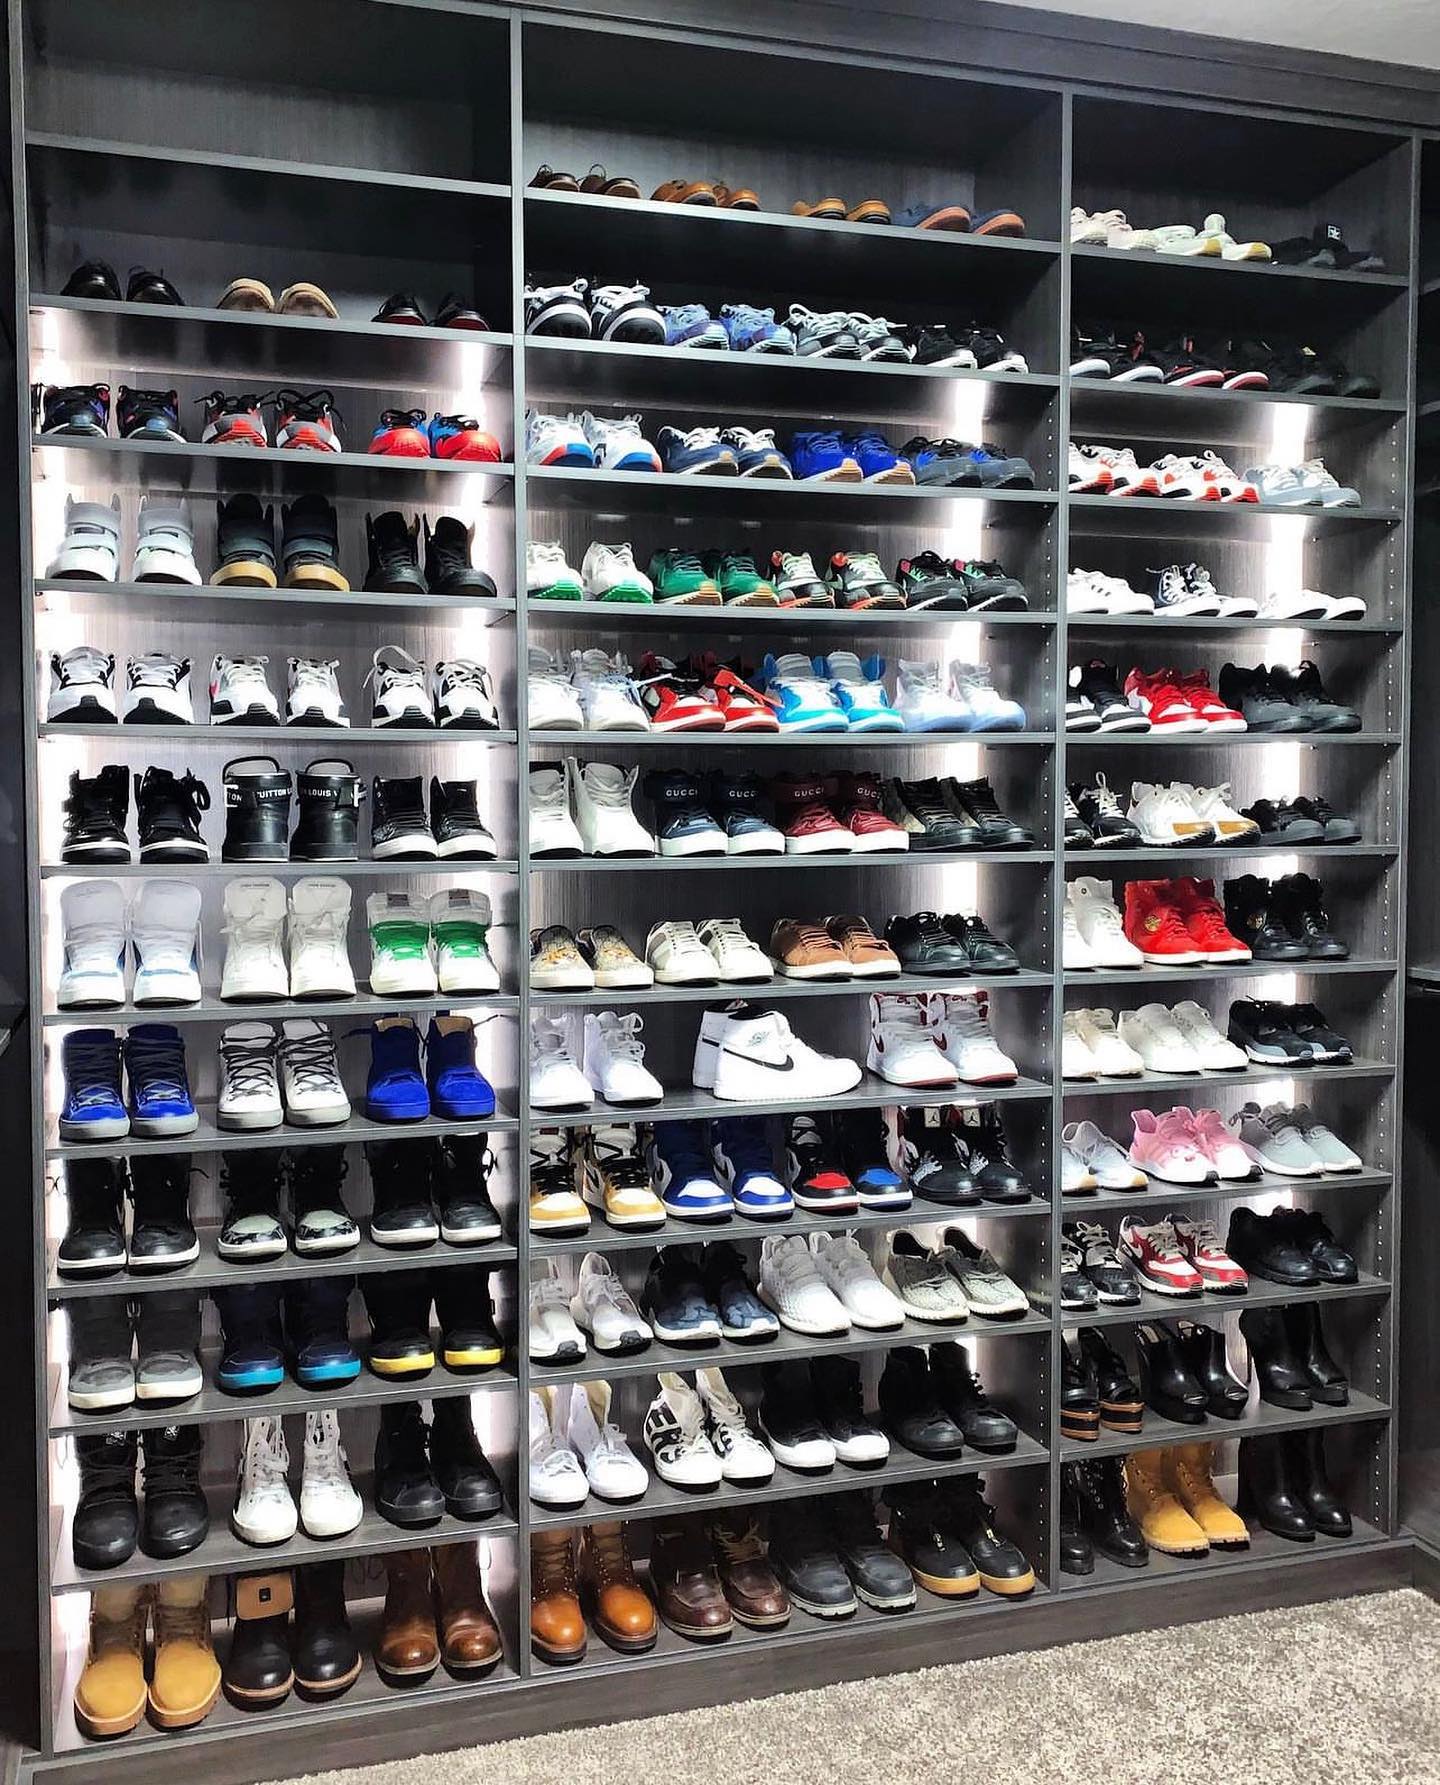
Clear Acrylic Shoe Shelves For Visibility

Benefits of Clear Shelves:
- Visibility: I can easily see my shoes without digging through boxes.
- Aesthetic Appeal: Clear or frosted options blend well with any closet design.
- Space-Saving: These shelves maintain an open feel, making my closet seem larger.
When organizing designer shoes, these shelves are perfect. They provide easy access and let me display my high-end footwear.
Design Tips:
- Select a unique shoe rack that complements your style.
- Mix and match shelving heights to accommodate different types of shoes.
- Position the shelves at eye level for the best visibility.
DIY Shoe Shelves With Shoe Boxes

For Creating DIY shoe shelves for shoe boxes. First, I design shelves specifically for clear or decorative boxes. This keeps everything tidy and easily accessible.
Next, I label or color-code the boxes. This way, I can quickly find my favorite pairs without rummaging through everything. It also gives a streamlined and attractive appearance to the closet.
These shelves are perfect for larger shoe collections. They provide stackable storage that maximizes space. I can fit more shoes without cluttering the area.
For a unique touch, I sometimes use a hexagon shoe rack. This design adds an interesting visual element, while still allowing for the functionality I need.
Hanging Fabric Shoe Shelves
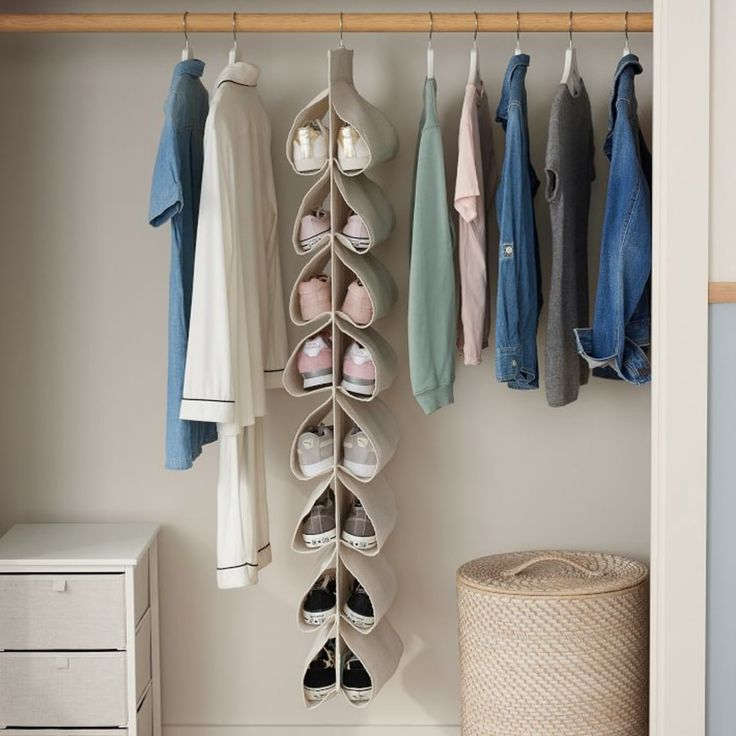
The hanging fabric shoe shelves are perfect for lightweight shoes like sandals and flats.
I love the idea of sewing or purchasing fabric pouches that can easily hang on a closet rod. This setup keeps my shoes visible and accessible while saving valuable floor space.
These hanging shelves work best in closets with limited room. They are especially handy for seasonal shoes or casual wear. Whenever I need to switch out my shoes, I find the process very simple.
Corner Shoe Shelves

Design Tips:
- Triangular Shelves: These fit snugly in corners and make the most of available space.
- Rotating Shelves: Ideal for reaching shoes tucked away at the back.
I found corner shelves perfect for small closets. They allow me to store more shoes without cluttering the floor.
DIY Slanted Shoe Shelves:
I love adding slanted shoe shelves. The angle helps shoes stay in place and makes them easy to grab. I can quickly see my favorites at a glance.
Adding some decorative baskets on the bottom can also keep smaller items organized. This way, everything has its spot, and I can enjoy a tidy space.
Finishing Touches: How to Style Your Shoe Shelves
To give my shoe shelves a polished look, I use decorative elements like baskets and labels. These small details make the space feel unique and organized.
An extra tip is to add a small rug or mat in front of my shelves. It adds a cozy feel and provides a soft surface for slipping on shoes.
Mixing styles and colors can really make a difference. I recommend experimenting with different arrangements until I find what looks best.
Conclusion
I encourage you to try this project for yourself. You can customize the design to match your closet and shoe collection perfectly.
Once you’ve built your own shelves, I’d love to see your creations! Share your finished projects on Pinterest or social media.