Making your own closet shelves is a fantastic way to enhance storage and organization in your home. This easy DIY project not only saves money but also allows you to tailor the shelves to fit your specific needs.
If you’re looking for a beginner-friendly project, creating closet shelves is a perfect choice. With just a few common materials, like wood and brackets, I can easily construct a sturdy and stylish storage solution. It’s satisfying to see how a simple effort can transform a messy area into a functional part of my home.
Let’s dive into how I built my own closet shelves and how you can easily do the same.
Why DIY Closet Shelves?

Creating DIY closet shelves offers several advantages. First, I can design custom shelves that perfectly fit my closet’s size and needs.
Building my own shelves is often more budget-friendly than buying pre-made options. I can source materials at lower costs and avoid the high markup prices of retail products.
Another benefit is the ability to personalize my closet organization. I can choose the style, color, and materials to match my home décor. This adds a unique and creative touch to my space that store-bought solutions can’t provide.
With custom shelves, I can easily implement a proper closet organization system. I can decide where to place items like shoes, clothes, and accessories for easy access. My organized closet is not only functional but also visually appealing, making my daily routine smoother.
Tools and Materials You’ll Need
Having the right tools and materials is crucial for building sturdy and functional DIY closet shelves. Here’s what I recommend to make the process smoother and more efficient.

Essential Tools
I find that having the right tools makes all the difference. Here’s a list of essential tools I use:
- Stud Finder: This tool helps me locate the studs in the wall, ensuring that my shelves are securely anchored.
- Circular Saw: Perfect for making straight cuts in wood and MDF sheets. It’s efficient for cutting large panels.
- Miter Saw: I use this to make precise crosscuts and angled cuts when fitting shelves.
- Table Saw: This tool is great for ripping boards down to size. It gives clean, straight cuts.
- Drill: A reliable drill is essential for making holes and driving screws.
Having these tools handy makes the whole process easier and more enjoyable.
Materials

The right materials are just as important as the tools. Here’s what I typically gather:
- MDF Sheets: I prefer MDF for its smooth finish; it’s easy to paint and looks great in any closet.
- Furring Strips: I often use these lightweight wooden strips for support and structure.
- Common Boards: These are useful for constructing shelves and adding strength.
- Wood Screws: A variety of screws will help secure the shelves firmly to the wall and support.
- Drywall Anchors: These are vital for providing extra support when I can’t attach shelves directly to studs.
- Wood Glue: I like to use glue alongside screws for added stability, ensuring my shelves hold up over time.
Gathering these tools and materials prepares me well for any DIY closet project.
Simple Floating Shelves for a Sleek Look

Creating minimalist floating shelves can enhance any closet. I prefer brackets that are hidden to maintain a clean and modern appearance.
Materials Needed:
- Floating shelf brackets
- Wood boards
- Screws
- Level
Steps to Build:
- Measure the wall space and mark where the shelves will go.
- Attach the brackets to the wall, ensuring they are level.
- Secure the wooden boards onto the brackets for a seamless look.
These shelves are ideal for smaller closets. They provide additional storage without consuming visual space.
Tips:
- Use quality floating shelf brackets; they support weight well and add to the aesthetic.
- Choose wood that complements your existing closet design.
Corner Shelves to Maximize Space

I can create corner shelves to make the most of wasted space in my closet. A few easy steps help transform those awkward corners into useful storage.
First, I measure the corner area to determine the shelf size. Next, I select sturdy materials like wood or metal for durability. I can then install floating shelves or use brackets for support. This process is simple and can be done in a couple of hours.
Various designs cater to different closet sizes. For a small closet, I opt for stackable corner organizers for shoes or bags. In larger spaces, I might incorporate tiered shelves to display decorative items along with additional storage.
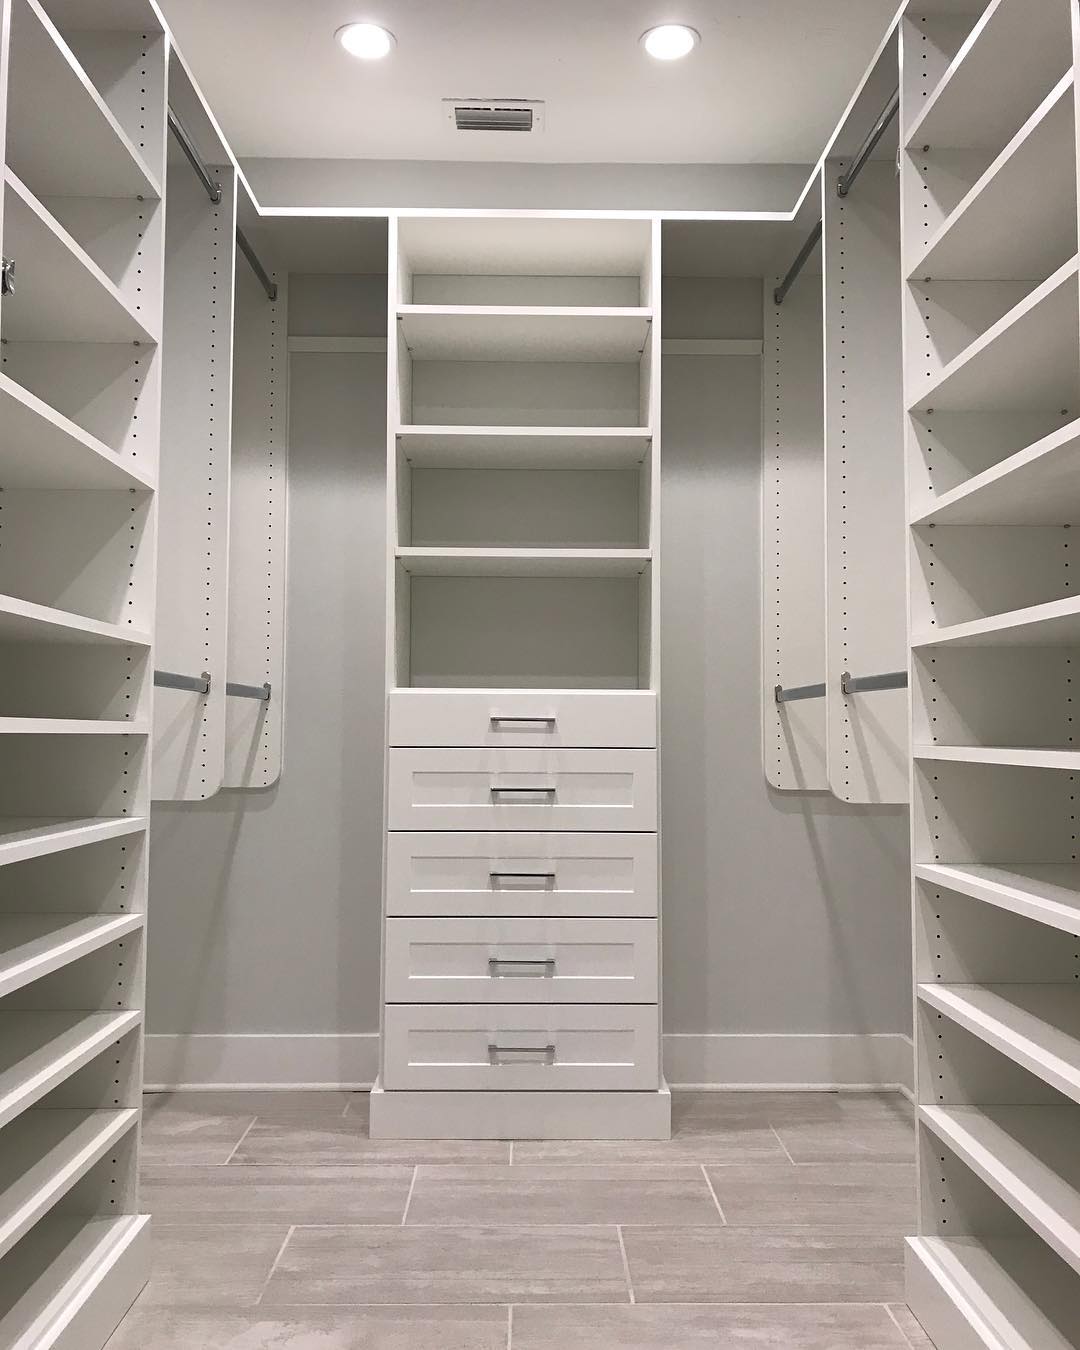
Adjustable Shelving System

Creating an adjustable shelving system is a great way to maximize storage space in a closet. I recommend using rails and brackets for easy installation. This setup allows for flexibility in shelf height, making it perfect for organizing various items.
Here’s how I do it:
- Gather Supplies: Purchase sturdy rails, brackets, and shelves. Wood works well for a classic look.
- Install the Rails: Attach the rails to the closet walls at your desired height.
- Add Brackets: Secure brackets at intervals along the rails. This enables quick adjustments.
Adjustable shelves can be positioned at different heights based on what I need to store. For example, I can dedicate higher spaces for bins and lower ones for shoes or folded clothes.
This type of shelving works especially well in walk-in closets or larger areas that require adaptable storage solutions.
DIY Wood Shelves with Brackets
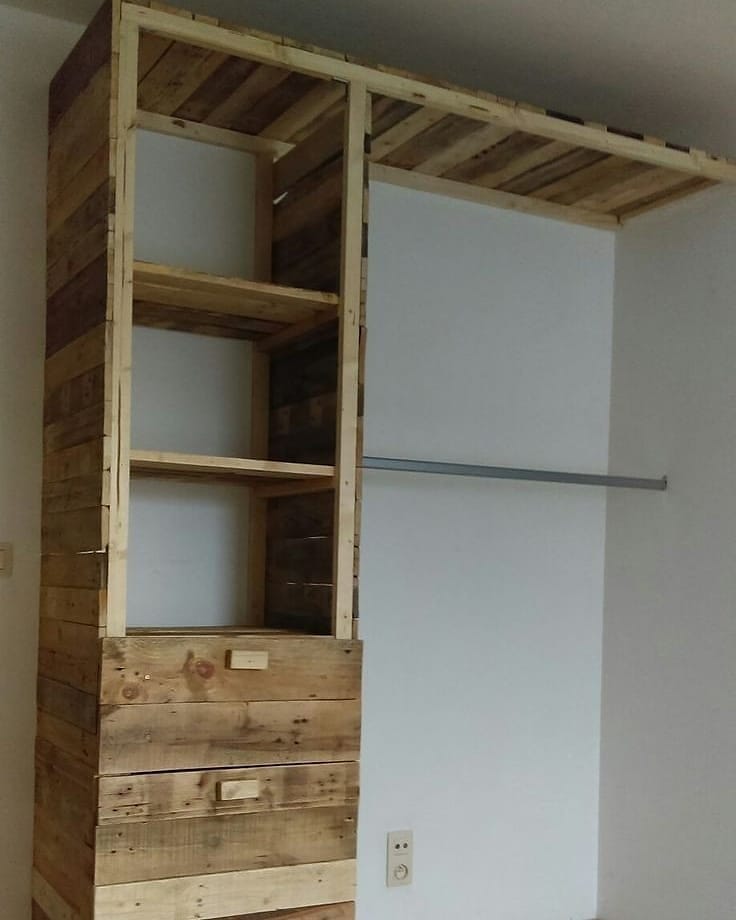
Building wood shelves with brackets is a straightforward project. I can create functional and stylish storage that fits my space perfectly.
I start by measuring the area available for the shelves. Selecting the right shelf brackets is key, as they support the weight of the shelves. Both decorative metal and wooden brackets can add a unique touch.
Next, I pick a sturdy wood for the shelves. Options include pine, oak, or plywood, depending on my budget and desired look. I can customize the finish by staining or painting the wood to match my closet décor.
For installation, I attach the brackets to the wall first. I use shelf supports to ensure stability. After securing the brackets, I place the wooden shelves on top, making sure everything is level.
This approach suits various spaces like bedrooms, coat closets, or linen closets.
Hanging Shelves with Cords or Rope

Creating hanging shelves using cords or rope adds a unique flair to any space. This method works well for achieving a boho or industrial style in a home.
I like using wooden planks for a sturdy look. Fabric shelves can also be utilized for a softer appearance. The mix of materials can enhance the overall aesthetic.
This shelf design is excellent for small areas. I often use them to display lightweight items. Hats, scarves, or shoes fit perfectly on these shelves.
To make these shelves, follow these simple steps:
- Select your materials: wooden boards or fabric, strong cords, and screws.
- Cut the boards to the desired size.
- Drill holes in the board’s corners.
- Cut cord lengths to hang your shelves at the preferred height.
- Securely attach your cords to the ceiling and adjust as needed.
With these hanging shelves, I can efficiently organize and display my items while adding visual interest. It’s a fun and functional project that anyone can tackle.
Built-in Shelving for Small Closets

Creating built-in shelving in a small closet maximizes space. I like to focus on a single wall or a corner for the best use of limited area. This approach opens up possibilities for more storage.
To organize items, I use stackable bins and baskets. They allow for easy access to smaller essentials. Keeping things tidy and visible makes finding what I need simpler.
Customization is key for a personalized touch. I often paint or apply wallpaper to enhance the shelving design. This not only adds style but also makes the closet feel more unique.
When building, I consider width and height. Shelves should be spaced to accommodate various item sizes. Adjustable shelves offer flexibility for my changing storage needs.
Incorporating hooks or additional racks can give more options for hanging items. A functional layout improves the usability of built-in shelving.
Shoe Shelves DIY Projects

Creating a shoe shelving unit can dramatically improve your closet space. I recommend using tilted or vertical shelves for optimal storage. This design allows shoes to be displayed neatly and within easy reach.
I find open shelves particularly beneficial because they provide visibility. With open designs, it’s simple to see all your footwear at a glance. On the other hand, enclosed shelves help keep shoes dust-free and protected.
These DIY projects work well in various settings. Walk-in closets are ideal, but entryways or smaller storage closets benefit just as much.
To get started, gather the necessary materials like wood, brackets, and screws. Measure your available space carefully, planning for shelf height and depth. After cutting the wood to size, assemble the shelves and attach them securely.
Organizing my shoes this way not only saves space but also adds a stylish touch to my home.
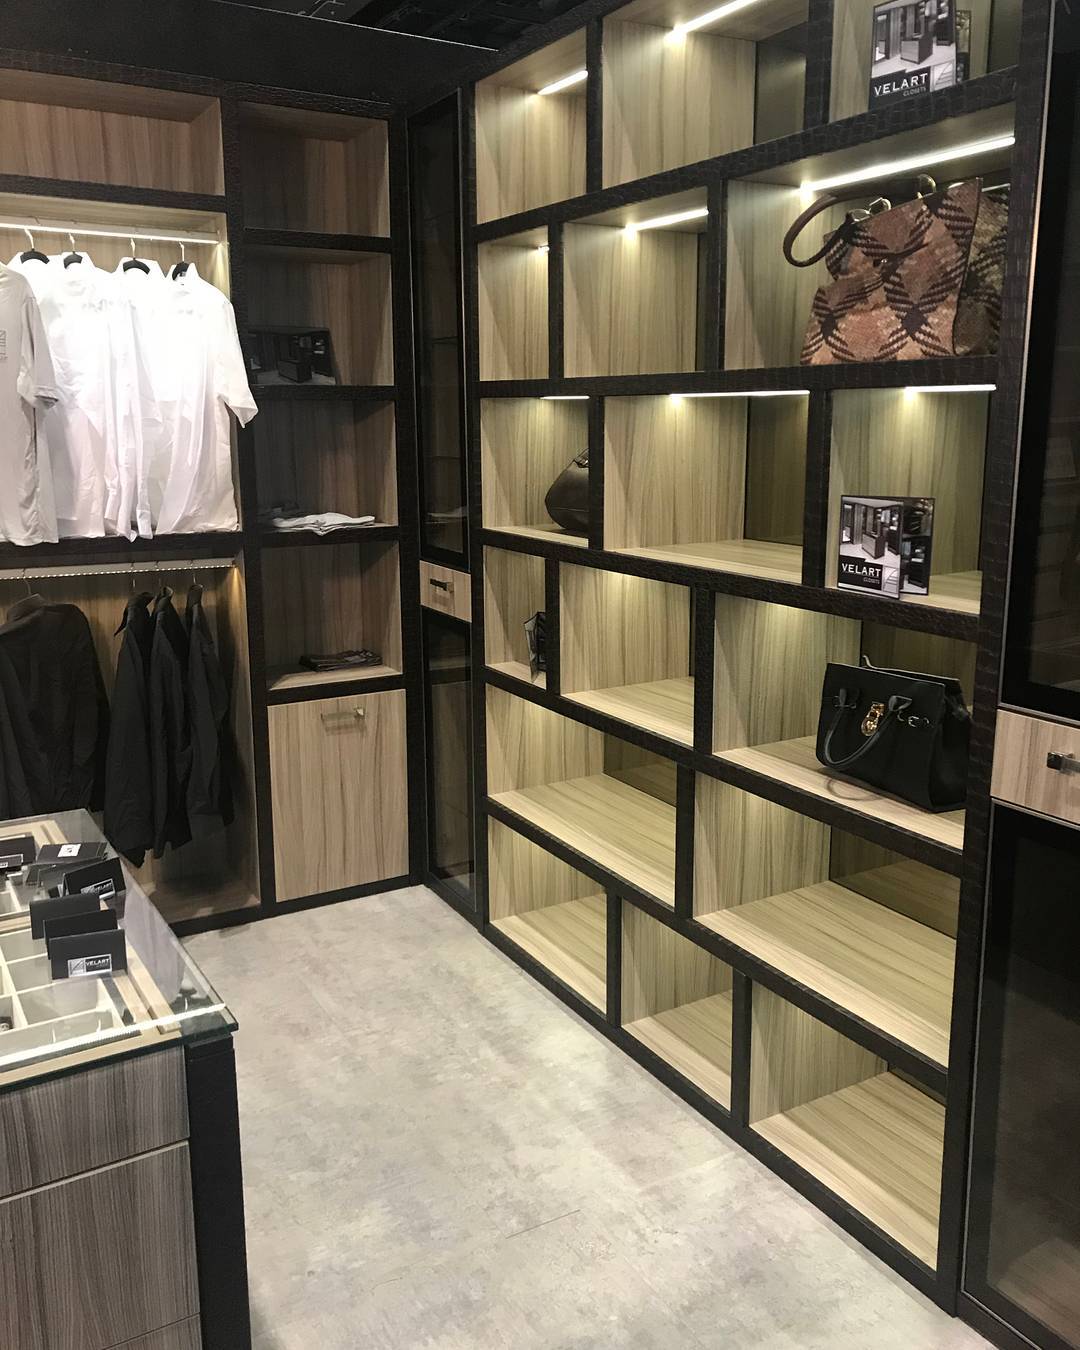
Modular Shelving Systems for Versatility
Modular shelving systems provide flexibility in organizing space. I can create shelves that are easily added, removed, or rearranged. This adaptability is ideal for meeting my changing storage needs.
With modular designs, I can tailor the layout to suit different requirements over time. This feature is perfect for growing families or shifting interests.
Aesthetically, modular units create a sleek, organized appearance. Clean lines and minimalist designs enhance the overall look of any room. I appreciate how these systems blend functionality with style.
Additionally, I can mix and match various components. Options like open shelves, drawer units, and hanging rods allow me to customize the setup.
DIY Closet Shelf Dividers

Creating my own closet shelf dividers is a simple way to keep my space organized. Dividers can help separate various items, making it easier to find what I need.
Materials I Can Use
- Wood: Sturdy and customizable for any shelf.
- Acrylic: Clear material that blends well and offers a modern look.
- Metal: Durable and great for heavy items.
Simple Steps to Follow
- Measure the Shelf: I start by measuring the width of the shelf to determine the size of the dividers.
- Cut the Material: Using my chosen material, I cut the dividers to fit.
- Install the Dividers: I simply place the dividers on the shelf to create spaces for folded clothes, shoes, or handbags.
Best Uses for Dividers
These dividers serve well for organizing:
- Folded Clothes: Keeps stacks neat and accessible.
- Shoes: Creates sections for different pairs, preventing them from toppling over.
- Handbags: Helps maintain shape and organization.
How to Paint or Stain Your Shelves

To start, I prep the shelves by cleaning them thoroughly. For a smooth finish, I sand the surfaces using sandpaper. This makes the paint or stain adhere better.
Next, I apply an oil-based primer. This step is essential for blocking stains and creating a solid base. Once the primer is dry, I can move on to painting or staining.
For a painted finish:
- Choose a color that matches your closet decor.
- Use a high-quality paintbrush for even application.
- Apply at least two coats for best coverage.
For staining:
- Select a stain that gives the desired look—rustic or sleek.
- Brush the stain on in the direction of the wood grain.
- Wipe off excess with a clean cloth for uniformity.
If I need to fill in gaps or holes, I use caulk or drywall mud. This makes everything look polished. Different finishes can change the vibe of the closet. A bright paint creates a modern look, while stain gives warmth.
How to Add Lighting to Your DIY Shelves
I find that adding lighting to my DIY shelves makes a big difference. There are several great options to consider.
LED Strip Lights are a fantastic choice. I can easily stick them under shelves for a continuous glow. They provide bright light and come in various colors.
Battery-Operated Lights are another practical solution. I use these where outlets are not available. They are simple to install and come in many styles.
Small Spotlights can be mounted under the shelves as well. These create a focused beam of light, ideal for highlighting specific items.
Adding lights enhances visibility especially in dark closets or spaces with limited natural light.
Besides practical benefits, lights improve the overall appearance of my shelves. They create an inviting atmosphere, showcasing my belongings beautifully.
Creative Ways to Use Old Furniture for Closet Shelves

If you have an old bookcase, think about modifying it. I often cut it down to fit into smaller spaces. This can provide ample shelving while maintaining style.
Repurposing old furniture can transform your closet. I find dresser drawers to be a unique option. They can be mounted on walls to create shelves.
Another idea is using wooden crates. Stack them in your closet for a rustic look. These crates are great for shoes or folded clothes.
Using furniture not only saves money but also promotes sustainability. It reduces waste by breathing new life into items you no longer use.
DIY Closet Shelves for Kids

Creating closet shelves for kids can make organizing clothes, shoes, and toys easy. I suggest building lower shelves so kids can reach what they need. Adjustable shelving systems are also a great option, allowing for changes as they grow.
Safety is a top priority. I recommend using non-toxic paint and securely attaching shelves to the wall. This keeps everything stable, especially with active little ones around.
To make the space appealing, I think bright colors or fun designs work wonders. Kids enjoy organizing their things in a space that feels vibrant and lively.
Organizing Seasonal Clothing with Shelves

To optimize closet space, I create shelves specifically for off-season clothing and accessories. This approach maintains order while making it easy to access items when needed.
I utilize bins or containers that slide in and out of the shelves. This design allows me to store seasonal items neatly without cluttering my closet.
With current-season clothes displayed prominently, I can quickly find what I need. Seasonal gear, like winter jackets or summer swimsuits, can be stored above or below within the shelves.
Labeling each bin helps me identify contents at a glance. This simple step saves time during outfit changes as seasons shift.
Conclusion
Creating DIY closet shelves offers many benefits. They are budget-friendly, personalized to your needs, and can add style to your space.
I encourage you to pick a project that matches your skill level and fits your closet. Start small if you’re new to DIY.
I’d love to see your DIY closet shelving projects. Feel free to share your results or follow for more tips on organization and home improvement!